I'm a member of an online paper crafting community called Stamp Nation. On their site, they have recently been having some classes focusing on mixed media and how to bring that look into cards. Admittedly, I'm not a mixed media crafter, however, the classes and videos have been inspiring and I've taken inspiration from some of the techniques.
While watching some of the videos on mixed media, I found myself thinking that I didn't have that particular supply or tool and so I couldn't try to replicate what I was seeing. It's quite easy in paper crafting to see someone use a certain medium, stamp set, or tool and immediately want to hop on a website and place an order for the exact products...ask me how I know!! However, if I take a moment and deconstruct a technique, I usually find that even though I might not have EXACTLY the same mediums or tools to use, I have plenty of supplies that can be used to achieve a similar outcome.
Take for instance this card below. In making this particular card, I didn't go out and buy anything special...I looked around at my supplies and decided to use what I had...and believe me, I have a lot to choose from!! The video I watched used acrylic paints to achieve a background...well instead, I chose to use my re-inkers for my Catherine Pooler ink pads and create a water color background. Once that was dry, I used a pretty background stamp sprayed with water to achieve the sort of stenciled effect on top of the water colored background. This wasn't exactly the technique used in the video, but close. I believe they used a stencil to achieve a similar layer on the background.
One thing I think of when it comes to mixed media is layers. Since I wanted to add another layer, but yet not cover up the background, I chose a lattice die cut from my stash and cut it out of plain white card stock. I figured that this would add a layer, but yet allow the background to be a focal point as well. I wanted to add a sentiment, but again, not cover up too much...so I added a smaller sentiment. Once I added the word JOY, I couldn't help but add some sparkle as well! I hope you enjoy my take on mixed media!
Welcome to my cozy corner of the internet! I intend to use this blog for sharing my creativity from the craft room to the kitchen and everything in between. Enjoy!
Sunday, April 15, 2018
Saturday, April 7, 2018
Water Colored Floral Background
I've experimented with water coloring lately and I thought this background stamp would be perfect for this technique. I first created a water colored panel and after it was completely dry, I stamped the Doodle Garden background stamp from Catherine Pooler onto the background using Versa Mark ink.
I then used bright white embossing powder and heat set the stamped background. I could have stopped there, but I wanted to water color some of the flowers even more, just to make them stand out a bit. While that was drying, I stamped and heat embossed the sentiment onto some vellum.
I cut the panel and the vellum out at the same time so that the edges would match up when I used a postage stamp die to cut them out. I decided to mount the panel using foam tape onto some green patterned paper I found in my stash. I mounted it all onto a white card base. I love the soft look of water color and think I'll probably be using this technique in the future!
Here is a look at the finished card as well as a few close ups.
I then used bright white embossing powder and heat set the stamped background. I could have stopped there, but I wanted to water color some of the flowers even more, just to make them stand out a bit. While that was drying, I stamped and heat embossed the sentiment onto some vellum.
I cut the panel and the vellum out at the same time so that the edges would match up when I used a postage stamp die to cut them out. I decided to mount the panel using foam tape onto some green patterned paper I found in my stash. I mounted it all onto a white card base. I love the soft look of water color and think I'll probably be using this technique in the future!
Here is a look at the finished card as well as a few close ups.
Saturday, March 31, 2018
Cover plate die as a stamp
I recently purchased my first cover plate die from a Catherine Pooler release. It's a beautiful stained glass die. This cover plate die is pretty when used as intended, but I wanted to see if I could turn it into a stamp! I've watched some You Tube videos on how crafters take their die cuts and make stamps out of them, and I thought, how hard can it be?! So I tried out the technique.
First I used the cover plate die to cut white fun foam, instead of card stock. After removing all the pieces from the cuts, I glued the fun foam to a piece of white card stock and backed it with a thin piece of chipboard to give it some stability.
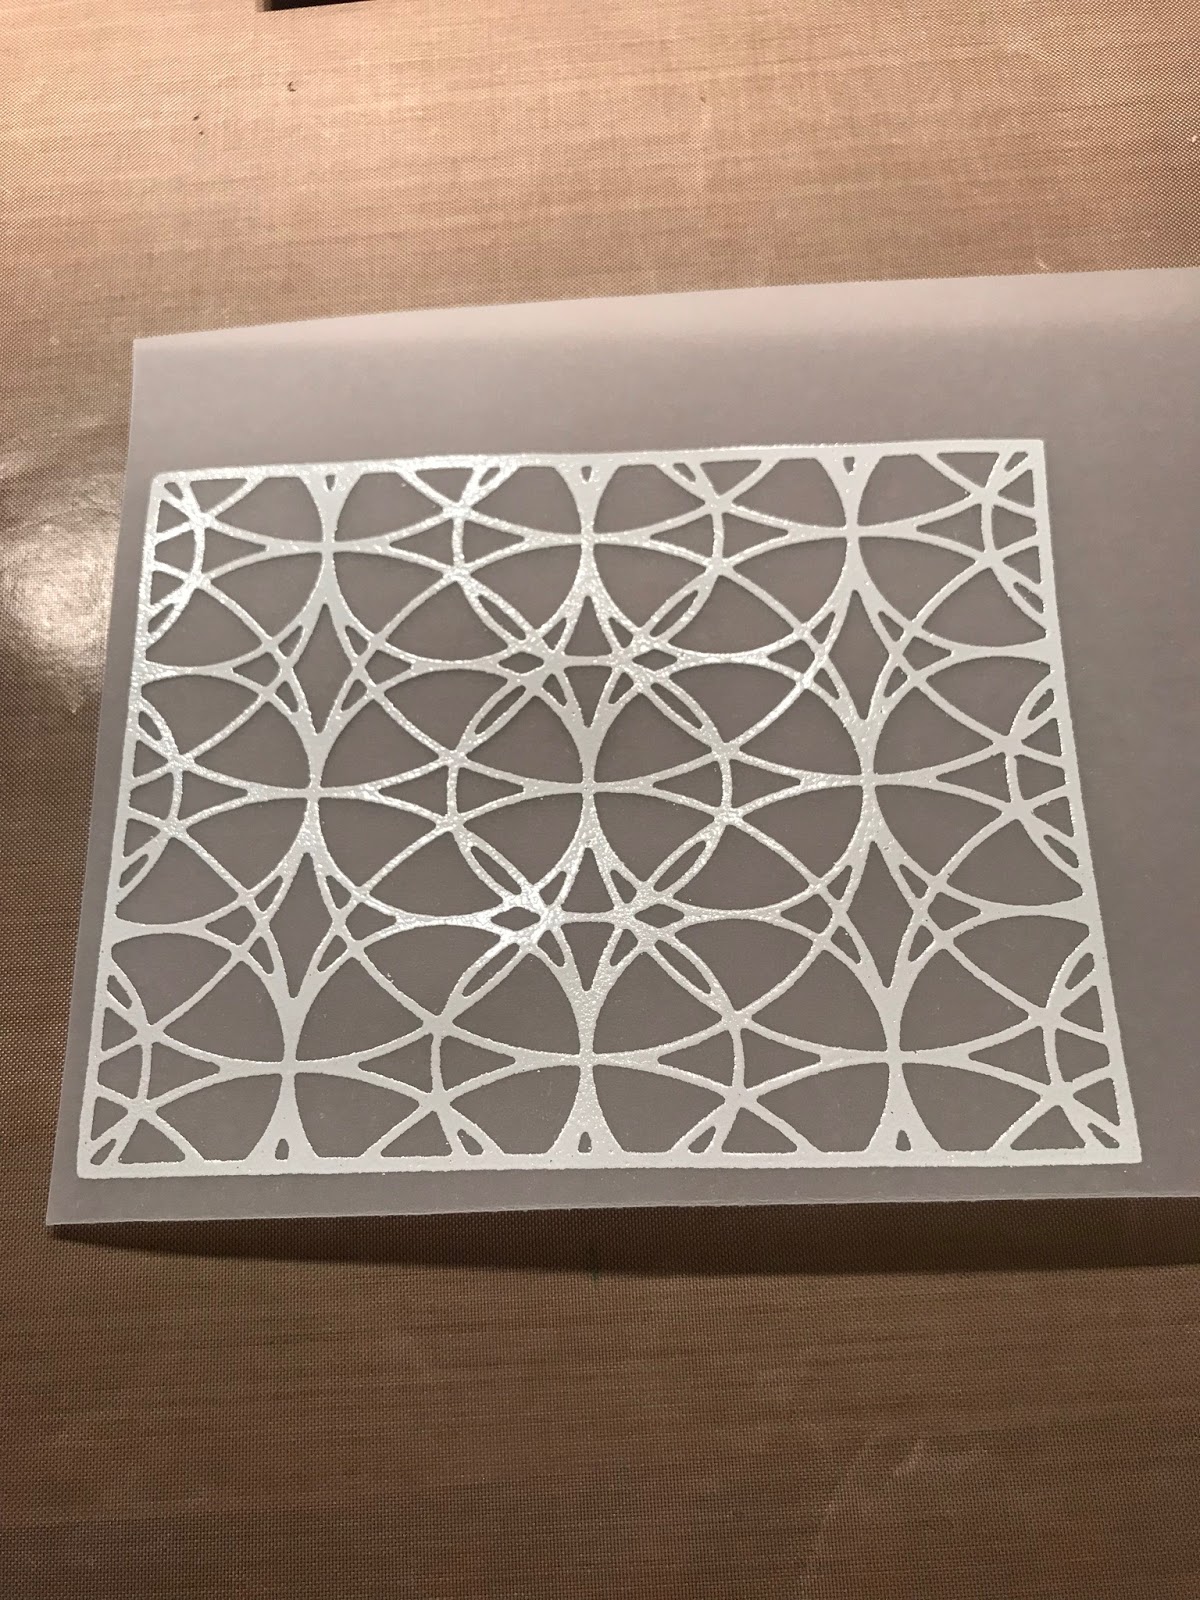
I put some temporary adhesive on the back side of the chipboard so that I could adhere it to the door of my MISTI. I then inked up my new "stamp" with Versamark ink and stamped it onto some new vellum from Catherine Pooler. After stamping it a few times to be sure it was all good and inked, I used some white embossing powder and covered the vellum. After heating up the embossing powder, I had the below...I was so excited that it worked as a stamp!
I then took a rainbow of colors from my Zig Clean Color Real Brush Markers and started coloring the image from the BACK side. This allowed me to go over the lines and not have to worry about it! You can see the back side view is kind of messy looking.
Once I was finished coloring, I turned it over and cut it down to fit the front of a card panel. I didn't want to add any sentiments to it as I didn't want to cover up any of the beautiful stained glass look of it. The panel was a little time consuming, but it was a lot of fun trying a new technique by turning this cover plate die into a stamp. And who doesn't like to do some coloring from time to time!?!
First I used the cover plate die to cut white fun foam, instead of card stock. After removing all the pieces from the cuts, I glued the fun foam to a piece of white card stock and backed it with a thin piece of chipboard to give it some stability.
I put some temporary adhesive on the back side of the chipboard so that I could adhere it to the door of my MISTI. I then inked up my new "stamp" with Versamark ink and stamped it onto some new vellum from Catherine Pooler. After stamping it a few times to be sure it was all good and inked, I used some white embossing powder and covered the vellum. After heating up the embossing powder, I had the below...I was so excited that it worked as a stamp!
I then took a rainbow of colors from my Zig Clean Color Real Brush Markers and started coloring the image from the BACK side. This allowed me to go over the lines and not have to worry about it! You can see the back side view is kind of messy looking.
Once I was finished coloring, I turned it over and cut it down to fit the front of a card panel. I didn't want to add any sentiments to it as I didn't want to cover up any of the beautiful stained glass look of it. The panel was a little time consuming, but it was a lot of fun trying a new technique by turning this cover plate die into a stamp. And who doesn't like to do some coloring from time to time!?!
Friday, March 30, 2018
Thank you stencil card
In the latest Catherine Pooler release there was a stencil designed by Shawna Clingerman. It was called the Square Dance Stencil. It's pictured below in it's original form.
When I stared at this stencil for what seemed like forever and tried to decide how best to use it, my eyes were drawn to the patterns within the design. Sometimes this is easy to do depending on the design. Whether she knows it or not, my mother, who is a quilter, taught me to see patterns within intended designs. So in THIS particular stencil, I envisioned a rainbow pattern. I used Distress Oxide inks to sponge on the color as I meticulously masked off areas of the stencil so each color had its own distinct place.
I added a black die cut thanks, adhered it to a black panel and then to a white card base. It's a 4 1/4" square card, smaller than the typical A2 size I normally make, but it packs a punch! Enjoy!
When I stared at this stencil for what seemed like forever and tried to decide how best to use it, my eyes were drawn to the patterns within the design. Sometimes this is easy to do depending on the design. Whether she knows it or not, my mother, who is a quilter, taught me to see patterns within intended designs. So in THIS particular stencil, I envisioned a rainbow pattern. I used Distress Oxide inks to sponge on the color as I meticulously masked off areas of the stencil so each color had its own distinct place.
I added a black die cut thanks, adhered it to a black panel and then to a white card base. It's a 4 1/4" square card, smaller than the typical A2 size I normally make, but it packs a punch! Enjoy!
Saturday, March 24, 2018
Welcome to my blog!
I took the plunge and started a blog! It's been simmering in my mind for a while now and I've finally decided to just sit down and do it! As my header says, my blog will have a variety of posts ranging from my creations from my craft room to the kitchen and anything in between.
One of my hobbies includes card making. I consider myself an amateur card maker and take a lot of inspiration from following other card makers on Instagram and You Tube. I've learned many techniques and styles over the past few years from these fellow card makers. And now I want to share my creations with all of you! If you'd like to see my Instagram page, you can find me at karenkcreates.
The latest card from my craft table is pictured below. It was a post on Stamp Nation for a CASE (copy and share everything) challenge. I hope you like it!
One of my hobbies includes card making. I consider myself an amateur card maker and take a lot of inspiration from following other card makers on Instagram and You Tube. I've learned many techniques and styles over the past few years from these fellow card makers. And now I want to share my creations with all of you! If you'd like to see my Instagram page, you can find me at karenkcreates.
The latest card from my craft table is pictured below. It was a post on Stamp Nation for a CASE (copy and share everything) challenge. I hope you like it!
Subscribe to:
Posts (Atom)